App Creation
As mentioned in the last tutorial, the App you see on start up is made from 7 Blocks. In this tutorial, we are going to recreate the app.
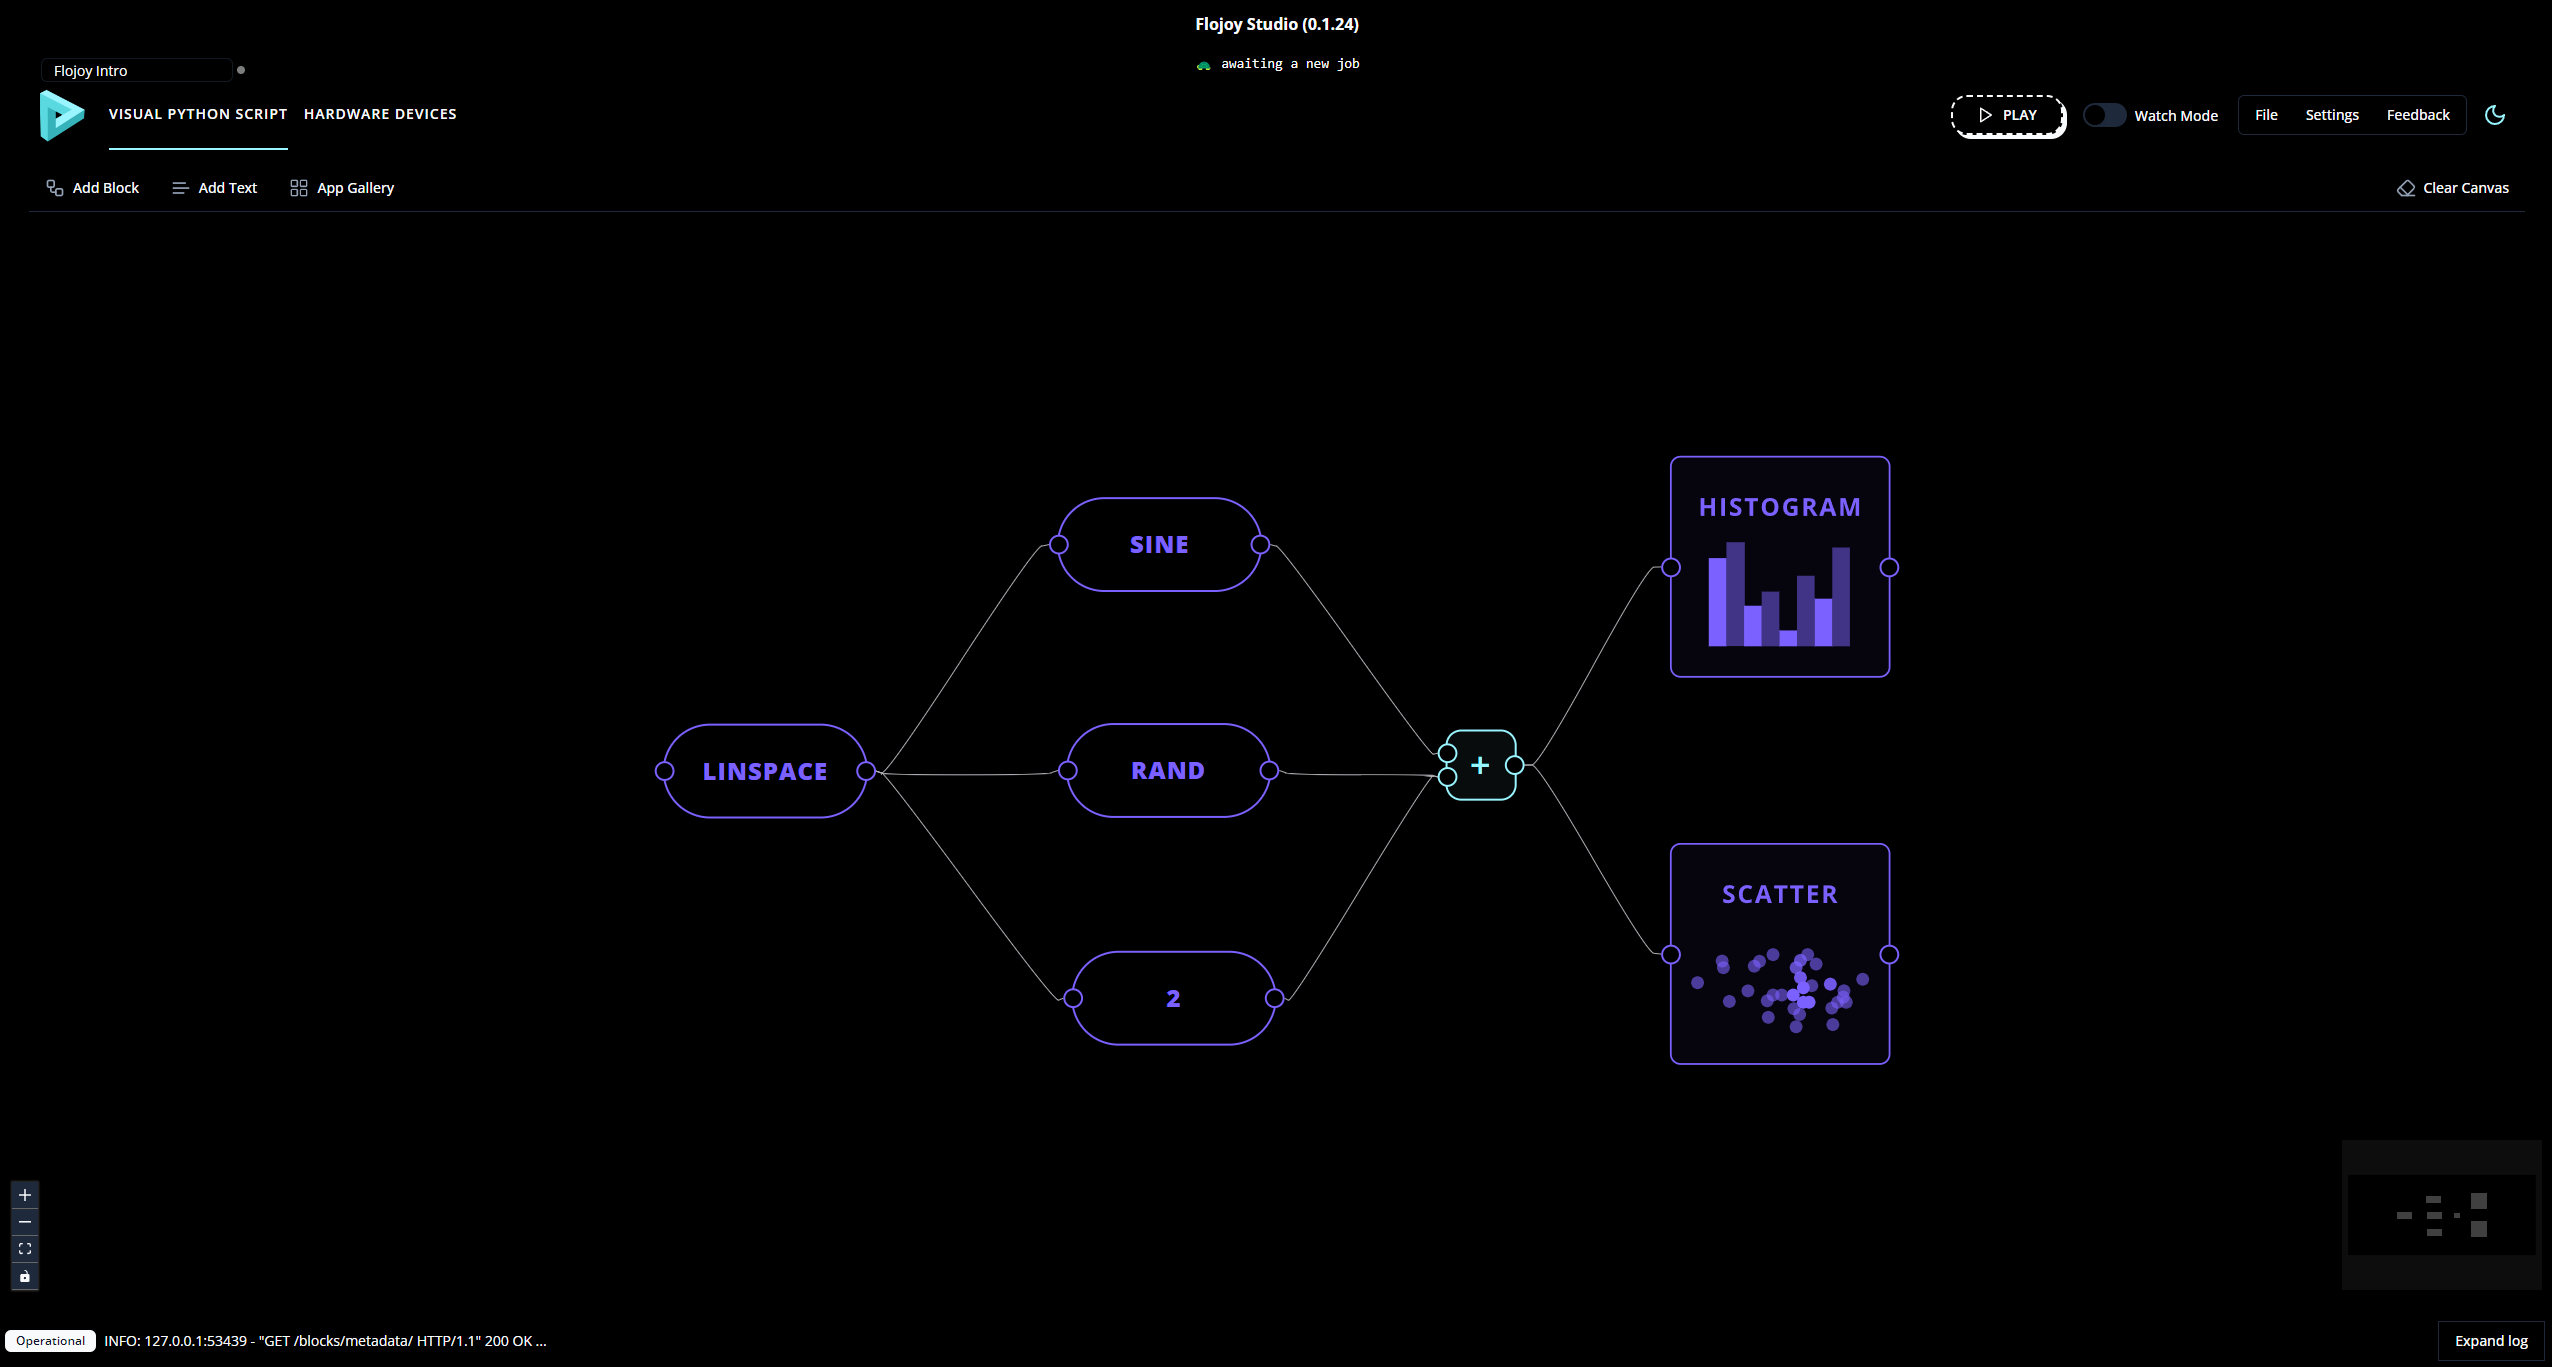
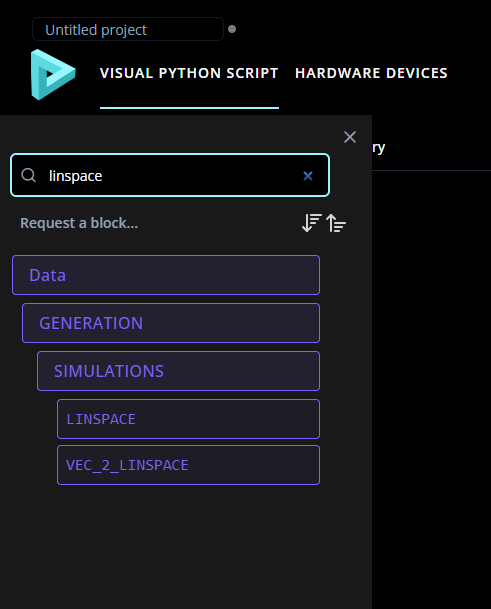
First use the Clear Canvas button to delete all Blocks. We can then add the first Block: use the Add Block button which should open a pop-up on the left side of the app. Then add the LINSPACE Block (using the search bar at the top of the Add Block menu is the easiest way).
Great! Now add the rest of the Blocks:
SINERANDSCALARADDSCATTERHISTOGRAM
and position the Blocks so that they, roughly, align with the starting app. The exact position of Block is not important.

Note that not all Blocks have their name printed on the screen. The ADD Block’s name is replaced by an addition symbol (+) and CONSTANT is replaced by 3. Note that in the starting app, the constant is instead 2. Let’s fix this by right clicking on the Block and pressing Edit Block (or: select the Block by left clicking and pressing Edit Block beside Clear Canvas). The following window should open on the right:
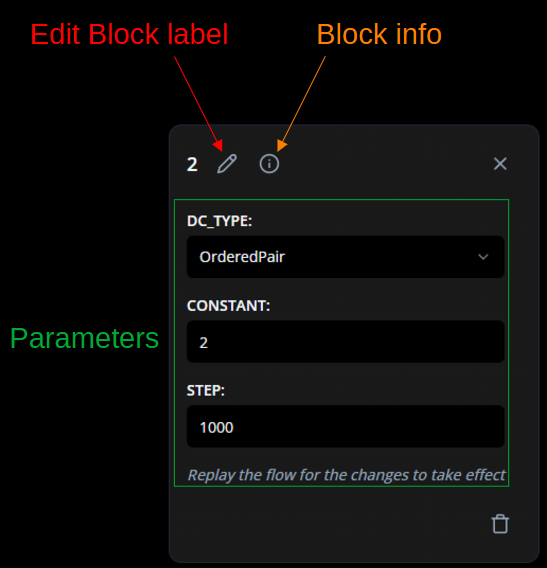
Note the colored labels were added to the picture. The Block info section contains the Block’s source code and other information. Don’t worry about it for now. For most Blocks, the label can be manually changed. However, the label for the CONSTANT will always be equal to the constant parameter.
Parameters change the properties of a Block. Many Blocks have parameters but not all. Each parameter can be editted manually. You can hover over the parameter name to see a preview of what each parameter does. For now, the only parameter we should change is constant: change it to 2. This parameter changes the value of the Blocks output. Note that the Block’s label changes.
The next step is connecting the Blocks. Although the exact placement of Blocks has no effect, how the Blocks are connected can have a drastic effect. One exception here is the ADD Block. Although the Block must have a connection on both the top and bottom inputs, the third connection can be on either the top or the bottom.

Once your connections match, run the app by pressing PLAY. Note in the picture below I’ve used my favourite feature that was added in Flojoy version 0.1.24: the ability to resize visualization Blocks such as SCATTER.

Now that the app is finished you can try save and loading it. In the File menu, press Save As and save the app in the desired location. You can then load the app later using File -> Load.